
Deciding to install a sprinkler system is the easy part. What most homeowners really want to know before they say yes is what actually happens next how long it takes, whether their lawn gets torn up, how much they need to be involved, and what they’re left with when it’s done. The good news: a professional residential installation is a well-worn process that, for most Johnson County yards, wraps up in a day or two with minimal disruption and a lawn that recovers fast. This guide walks you through the whole thing start to finish from the first consultation to the final walkthrough so you know exactly what to expect. If you’re still weighing whether to DIY or hire a pro, this is what the professional route looks like; when you’re ready, our professional residential irrigation installation handles all of it.
THE SHORT ANSWER
The process: consultation & quote → design & zone plan → permit & utility locate → install day (tap, backflow, trench, pipe, heads, controller) → commissioning & walkthrough → seasonal care plan. How long: most quarter-acre yards take 1–3 days; larger or complex up to 5. Your part: approve the design, mark any private lines, pick your controller then it’s hands-off. Disruption: minimal modern trenching is narrow and the lawn recovers quickly.
Phase 1: The consultation and quote
Everything starts with a visit to your property not a phone estimate, because an accurate quote depends on things that can only be measured on site. During the consultation, the installer walks your yard, checks your home’s water pressure and flow rate, notes sun and shade areas, slopes, existing landscaping, and where the beds and lawn zones are. You’ll talk through what you want watered and any preferences (like a smart controller or drip lines for beds). From that, you get a written quote with the zone count and price. This is also your chance to ask questions a good installer explains the plan in plain terms. If budget is on your mind, it helps to already understand what a new system costs before the visit, so the quote lands in context.
Phase 2: System design and zone planning
Once you approve the quote, the system is designed and this is the behind-the-scenes work that makes a system water evenly instead of leaving dry spots. The installer maps your yard into zones (groups of heads that run together), calculates how many heads each zone can support given your water pressure, and plans head placement so spray patterns overlap for full coverage. Different areas get different zones: sunny lawn, shady side yard, and flower beds all have different water needs. You don’t have to do anything in this phase except approve the layout but it’s the single most important step for how well your system will perform, which is why professional design matters.
Phase 3: Permits and utility locating
Before any digging, two things get handled usually by the installer, so you don’t have to. First, most Kansas jurisdictions require a permit for a new irrigation system, which the company typically pulls for you. Second, underground utilities must be located: a call to 811 brings out the utility companies to mark gas, electric, cable, and water lines so nothing gets hit. This step is legally required and protects everyone. If you have private lines the utilities won’t mark like a landscape lighting cable, a pet fence, or a gas line to a grill or fire pit this is when you’ll be asked to point them out. It’s the one bit of homework you may have.
Curious what your yard would take? Book a free irrigation consultation or call (913) 829-4949 we’ll assess your property and walk you through the plan.
Phase 4: Installation day
This is the day the system goes in and for most quarter-acre yards, it’s done start to finish in a day or two. Here’s what happens, so nothing is a surprise:
- Water tap and backflow. The crew connects the system to your main water line and installs the backflow preventer that protects your drinking water. Getting
- Water tap and backflow. The crew taps your main water line and installs the backflow preventer that protects your drinking water the backflow device installed correctly is a code-regulated part of the job, handled by the pros.
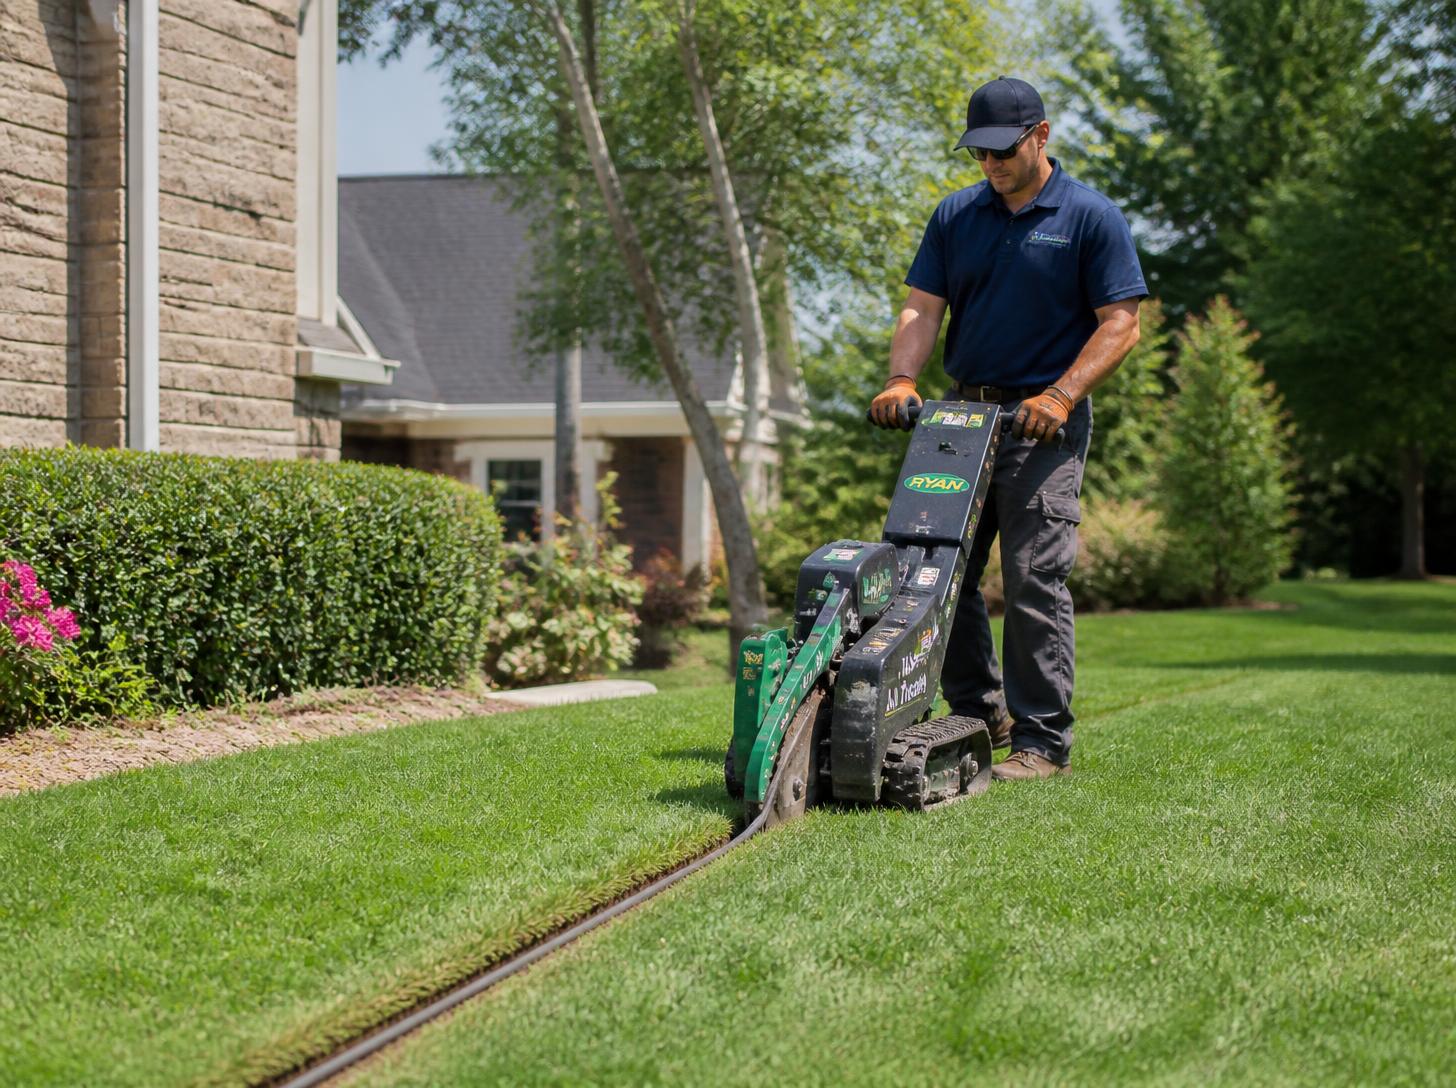
- Trenching. Trenches are dug along the zone layout for the pipe. Modern crews use a vibratory plow or narrow trencher that slices a thin line through the turf rather than tearing up wide strips this is why the lawn recovers so quickly.
- Pipe, valves, and manifold. Pipe is laid in the trenches, the valve manifold (the cluster that controls each zone) is assembled and connected, and lines run out to every zone.
- Sprinkler heads. Heads are installed at each planned location, set flush with the ground, and positioned for their zone.
- Controller. The controller basic timer or smart Wi-Fi is mounted (usually in the garage) and wired to the zone valves.
- Backfill. Trenches are closed and the turf tamped back down. Within a couple of weeks, the thin trench lines blend back into the lawn.
You don’t need to lift a finger during install day, and in most cases you don’t even need to be home the whole time though it’s good to be available at the start and end. The crew works around your existing landscaping and cleans up as they go.
Phase 5: Commissioning and your walkthrough
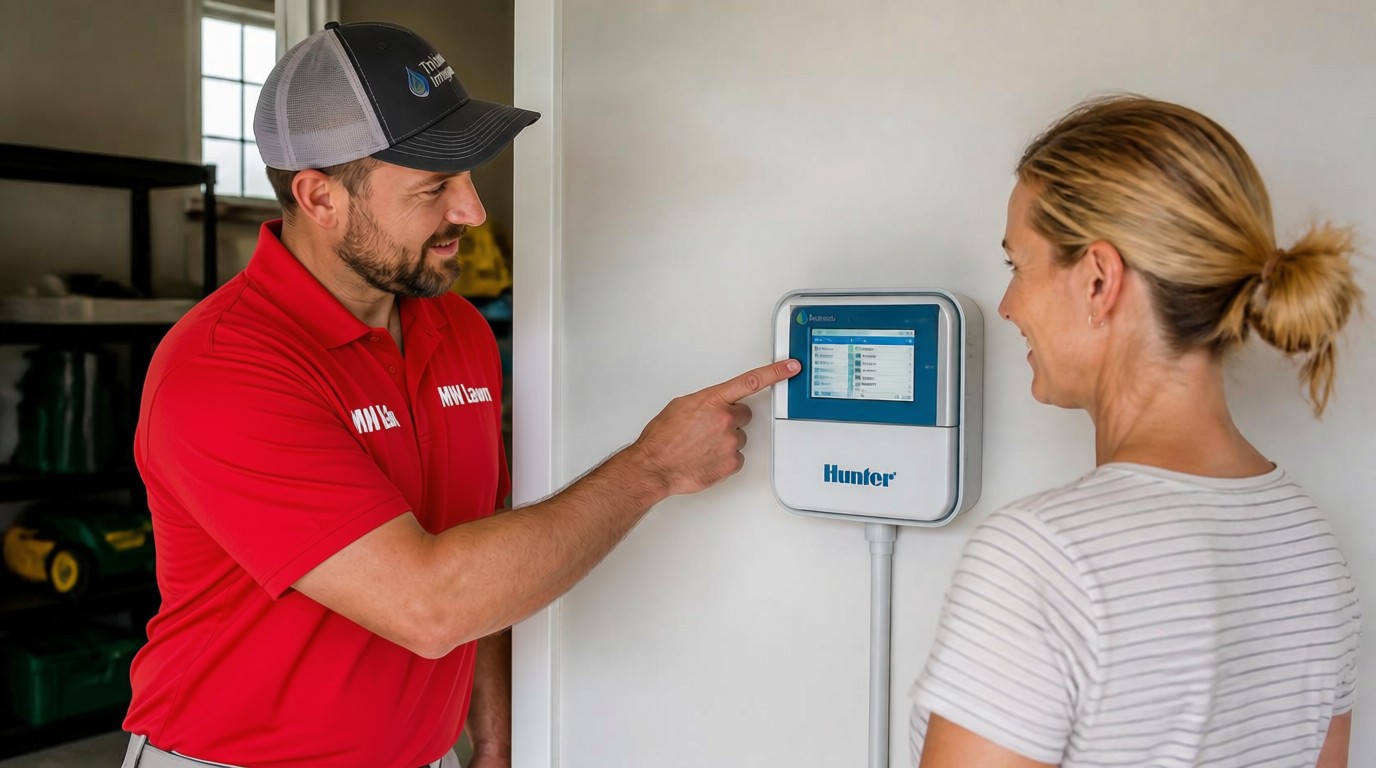
Before the crew leaves, the system is commissioned tested and tuned and this is where a professional install really shows. Each zone is run while the installer checks for leaks, confirms full coverage, and adjusts every head’s spray pattern and radius so it waters the lawn and not the driveway, house, or street. Then comes your walkthrough: the installer shows you how to use the controller, explains the watering schedule, and answers your questions. By the end you have a working system, a schedule set for the season, and the knowledge to run it. This handover is something DIY never includes and a rushed installer skips so it’s worth making sure it happens.
Phase 6: Aftercare and the seasonal plan
A sprinkler system isn’t quite set-and-forget in Kansas, two seasonal jobs keep it healthy, and a good installer sets you up for both from day one:
- Winterization (fall). Before the first hard freeze, the lines are blown out with compressed air so trapped water can’t freeze and crack the system. This is essential in our climate skipping it can cause expensive damage.
- Spring startup. Each spring the system is turned back on carefully, re-pressurized, and checked head by head. a spring startup each season catches any winter damage and gets you watering for the year.
Beyond that, the system largely runs itself especially with a smart controller that adjusts to the weather. The best part of the whole process is what happens after: you stop thinking about watering, and your lawn stays green through the summer on its own.
How long does the whole thing take?
Here’s the realistic timeline from decision to done:
| Stage | Typical timeframe |
|---|---|
| Consultation to quote | Same visit, or a day or two after |
| Design & scheduling | A few days to a couple of weeks (season-dependent) |
| Permit & utility locate | A few business days (811 locate is usually 2–3 days) |
| Installation (¼-acre) | 1–3 days on site |
| Installation (large/complex) | Up to ~5 days |
| Commissioning & walkthrough | Same day as install completes |
The actual install is quick; the lead time is mostly scheduling and the utility locate. Spring and early summer are peak demand, so booking ahead gets you a better slot. Clay soil can add a little trenching time, but rarely changes the day-or-two reality for a typical yard.
What you’ll need to do (and what you won’t)
Homeowners are often surprised how little is required of them. Here’s the honest split:
| You do | We handle |
|---|---|
| Approve the design and quote | Site assessment, pressure test, system design |
| Point out private lines (lighting, pet fence, gas to grill) | Permit and the 811 utility locate |
| Choose your controller (basic or smart) | Water tap, backflow, trenching, pipe, heads, wiring |
| Be reachable at start and finish | Commissioning, tuning, cleanup, and the walkthrough |
| Follow the watering schedule after | Seasonal winterization and spring startup |
That’s really it. The heavy, technical, and regulated parts are all on the installer; your job is a few decisions and a little access.
Ready to stop dragging hoses? Book a free irrigation consultation or call (913) 829-4949 we’ll handle every phase, start to finish.
Why Olathe homeowners choose MW Lawn & Landscape
A smooth installation is the product of experience, and after 25+ years installing systems in Johnson County, we’ve made the process painless:
- We design for your yard. Zones matched to your real water pressure and layout, so coverage is even from day one the part that decides whether you love the system.
- We handle the paperwork and the plumber. Permit, 811 locate, and the code-compliant backflow all managed, so you don’t have to chase anything.
- Minimal disruption. Narrow trenching, careful work around your landscaping, and a lawn that blends back within weeks.
- A real walkthrough. We don’t leave until you know how to run your system and it’s tuned zone by zone and we’re here for winterization, startup, and repairs every season after.
- Family-owned, licensed, insured, and warrantied the same local team, year after year, since 2000.
Serving Olathe, Overland Park, and Johnson County
MW Lawn & Landscape designs and installs residential sprinkler and drip systems across Olathe, Overland Park, and the surrounding Johnson County communities and we handle the whole process so you don’t have to think about it. From the first walkthrough to the final zone adjustment, we’ll design a system that waters evenly, install it with minimal disruption, and show you exactly how to run it. That’s what a professional installation should feel like.
Frequently Asked Questions
How long does it take to install a sprinkler system?
Most residential quarter-acre systems are installed in one to three days on site, while larger or more complex properties can take up to about five days. The actual installation is quick; the longer part of the timeline is usually scheduling and the utility locate (typically two to three business days after calling 811). Clay soil can add a little trenching time but rarely changes the day-or-two reality for a typical yard.
What is involved in installing an irrigation system?
The full process has several phases: an on-site consultation and quote, system design and zone planning, permits and an 811 utility locate, the installation itself (tapping the water line, installing the backflow preventer, trenching, laying pipe and valves, setting heads, and wiring the controller), commissioning and tuning each zone, and a homeowner walkthrough. Seasonal winterization and spring startup follow to keep the system healthy.
Will installing a sprinkler system tear up my lawn?
Not significantly. Modern crews use a vibratory plow or narrow trencher that slices a thin line through the turf rather than digging wide trenches, so disruption is minimal. The thin trench lines are backfilled and tamped, and typically blend back into the lawn within a couple of weeks. A professional crew also works carefully around your existing landscaping.
Do I need to be home during the installation?
It’s good to be available at the start and the end the start to confirm the plan and point out any private lines, and the end for the walkthrough where you learn to run the system. You don’t need to be present for the entire installation, since the crew works independently through the middle of the job.
What do I need to do as the homeowner?
Very little. You approve the design and quote, point out any private underground lines the utilities won’t mark (like landscape lighting, a pet fence, or a gas line to a grill), choose your controller, and be reachable at the start and finish. The installer handles the site assessment, design, permit, utility locate, all the physical work, tuning, cleanup, and the walkthrough.
Do I need a permit for a sprinkler system?
In most Kansas jurisdictions, yes a permit is required for a new in-ground irrigation system, and an 811 utility locate is legally required before digging. A professional installer typically pulls the permit and schedules the locate for you, so it’s handled as part of the process rather than something you manage yourself.
What happens at the end of the installation?
The system is commissioned each zone is run and checked for leaks and full coverage, and every head is adjusted so it waters the right areas. Then you get a walkthrough where the installer shows you how to use the controller, explains the watering schedule, and answers questions. You finish with a fully working, tuned system and a schedule set for the season.
What maintenance does a new sprinkler system need?
Two seasonal jobs in Kansas: winterization in the fall, where the lines are blown out with compressed air before the first hard freeze so trapped water can’t crack the system, and a spring startup, where the system is re-pressurized and checked head by head. Beyond that, the system largely runs itself, especially with a smart controller that adjusts watering to the weather.